Forum
Install Homebrew · Mac / Hackintosh ( How to - Complete Guide ) Commencé par Chetouane · 21 Réponses
Publié: 2 ans
Install Homebrew
Step by step instructions explaining how to install Homebrew on a Mac, either Mac Intel or Mac M1. Developers use Homebrew to install various software packages on a Mac. You'll need Xcode Command Line Tools as a prerequisite, but if you don't have it, Homebrew will install it.
Tip: If you did not use a password to log in to your Mac (that is, if your password is blank), you cannot install Homebrew.
Steps
Here are steps to install Homebrew (details in this complete guide).
These instructions are for a terminal running Zsh, the Z shell, on a newer Mac. Older Macs may be running the bash shell and you should upgrade.
Check for Homebrew
Check if Homebrew is installed:
If Homebrew is not installed, you will see:
If Homebrew is not installed, there should be no Homebrew files in /usr/local (for macOS Intel) or /opt/homebrew (for Apple Silicon).
Brew install
Homebrew provides an installation script you can download and run with a single command (check that it hasn't changed at the https://brew.sh/). This is the easiest way to install Homebrew.
The Homebrew installation script will ask you to enter your Mac user password. This is the password you used to sign into your Mac.
You won't see the characters as you type. Press enter when you are done.
You'll see a list of files and folders that Homebrew will install.
Option to install XCode Command Line Tools
If you haven't already installed XCode Command Line Tools, you'll see a message that "The XCode Command Line Tools will be installed." Press return to continue when prompted by the Homebrew installation script. It takes one to two minutes to download and install the Command Line Tools.
You’ll see diagnostic and progress messages. Homebrew installation takes 1.5 minutes on a 2021 Mac M1 Mini, with a 100Mbps Internet connection. It's significantly slower on Mac Intel over a slow Internet connection.
On Mac Intel machines, that's all you need to do; Homebrew is ready to use. On Mac Intel, Homebrew installs itself into the /usr/local/bin directory, which is already configured for access by the shell with the macOS default $PATH environment variable (the default is set by the /usr/libexec/path_helper command).
Add Homebrew shell configuration
On Apple Silicon machines, there's one more step. Homebrew files are installed into the /opt/homebrew folder. But the folder is not part of the default $PATH. Follow Homebrew's advice and create a ~/.zprofile file which contains a command which sets up Homebrew. Homebrew shows instructions at the end of the installation process:
- Add Homebrew to your PATH in ~/.zprofile:
The Homebrew console output will show your user directory name (the example above contains the Unix ~ tilde shortcut instead).
Alternative shell configuration
Alternatively, you can use a favorite text editor to edit the ~/.zprofile file. Or open ~/.zprofile to use TextEdit to edit the file. You'll need to add the line eval "$(/opt/homebrew/bin/brew shellenv)" to the file.
Some developers don't use the ~/.zprofile file, preferring to set the shell configuration in the ~/.zshrc file. That's okay, but the ~/.zshrc file is evaluated every time a shell is launched. The ~/.zprofile file is only evaluated when you login to your mac user account, so setting the shell with the ~/.zprofile file happens only once at login, saving some overhead.
After you've installed Homebrew, check that Homebrew is installed properly.
You should see:
On Apple Silicon, if you see zsh: command not found: brew, check that you've created a ~/.zprofile file as described above and restart your terminal application.
If Homebrew is successfully installed, there will be Homebrew files in /usr/local (for macOS Intel) or /opt/homebrew (for Apple Silicon).
Listing installed packages
As you use Homebrew, it is helpful to see a list of all the packages you've installed:
[cpde]
$ brew list
You can also see a diagram of packages and dependencies.
Right now, immediately after installation, these commands show nothing is installed.
Now you can use Homebrew to install packages. But first, be aware that you may have to reinstall Command Line Tools after a macOS upgrade.
After a macOS Upgrade
After a macOS upgrade (for example, from macOS 11.2.2 to 11.2.3), the upgrade process may remove the Command Line Tools. This can be annoying if you install an upgrade and then find you can't use commands such as git. You may encounter an error like:
Checking for the Command Line Tools folder may show that the folder is there:
But look closely and the Command Line Tools folder may be missing essential folders and files after a macOS upgrade. It should look like this:
It may look like this after an upgrade:
Homebrew is installed but brew doctor will show problems:
You've already installed Homebrew and allowed Homebrew to install Xcode Command Line Tools. Now you must re-install Xcode Command Line Tools from the command line:
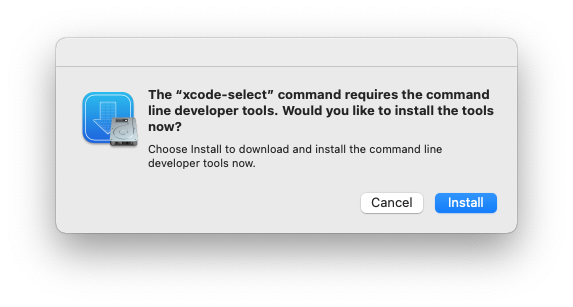
A message will pop up on the screen. Confirm that you want to install the tools.
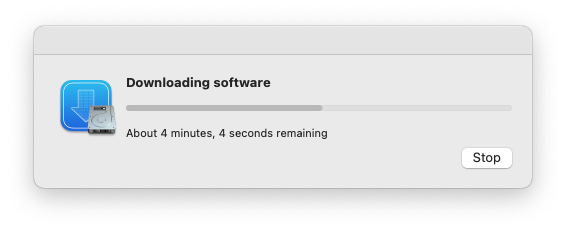
You'll see a progress indicator as the software downloads.

Finally you'll see a confirmation that the software was installed.
Verify that you've successfully installed Xcode Command Line Tools.
Check that you can run git:
You've seen how to reinstall Command Line Tools after a macOS upgrade.
Step by step instructions explaining how to install Homebrew on a Mac, either Mac Intel or Mac M1. Developers use Homebrew to install various software packages on a Mac. You'll need Xcode Command Line Tools as a prerequisite, but if you don't have it, Homebrew will install it.
Tip: If you did not use a password to log in to your Mac (that is, if your password is blank), you cannot install Homebrew.
Steps
Here are steps to install Homebrew (details in this complete guide).
- ... Prepare your Mac.
Install Homebrew.
Update the shell configuration (Mac M1 only).
Install packages.
These instructions are for a terminal running Zsh, the Z shell, on a newer Mac. Older Macs may be running the bash shell and you should upgrade.
Check for Homebrew
Check if Homebrew is installed:
$ brew If Homebrew is not installed, you will see:
zsh: command not found: brew If Homebrew is not installed, there should be no Homebrew files in /usr/local (for macOS Intel) or /opt/homebrew (for Apple Silicon).
Brew install
Homebrew provides an installation script you can download and run with a single command (check that it hasn't changed at the https://brew.sh/). This is the easiest way to install Homebrew.
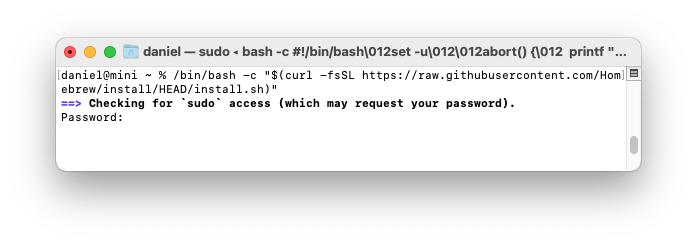
$ /bin/bash -c "$(curl -fsSL https://raw.githubusercontent.com/Homebrew/install/HEAD/install.sh)" The Homebrew installation script will ask you to enter your Mac user password. This is the password you used to sign into your Mac.
Password:
You won't see the characters as you type. Press enter when you are done.
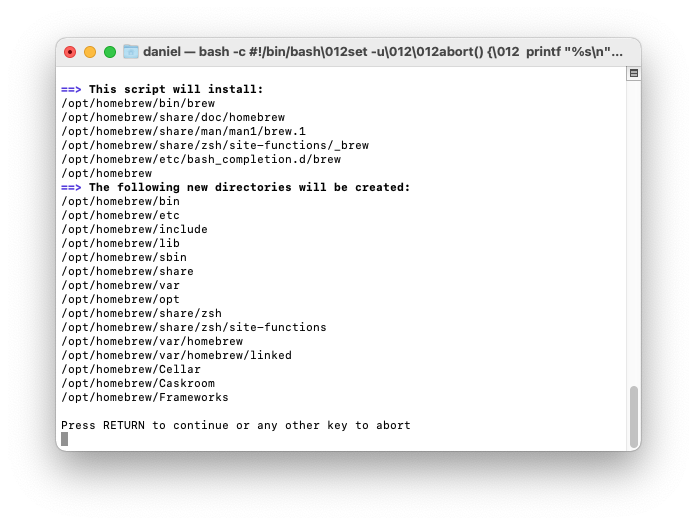
You'll see a list of files and folders that Homebrew will install.
Option to install XCode Command Line Tools
If you haven't already installed XCode Command Line Tools, you'll see a message that "The XCode Command Line Tools will be installed." Press return to continue when prompted by the Homebrew installation script. It takes one to two minutes to download and install the Command Line Tools.
You’ll see diagnostic and progress messages. Homebrew installation takes 1.5 minutes on a 2021 Mac M1 Mini, with a 100Mbps Internet connection. It's significantly slower on Mac Intel over a slow Internet connection.
On Mac Intel machines, that's all you need to do; Homebrew is ready to use. On Mac Intel, Homebrew installs itself into the /usr/local/bin directory, which is already configured for access by the shell with the macOS default $PATH environment variable (the default is set by the /usr/libexec/path_helper command).
Add Homebrew shell configuration
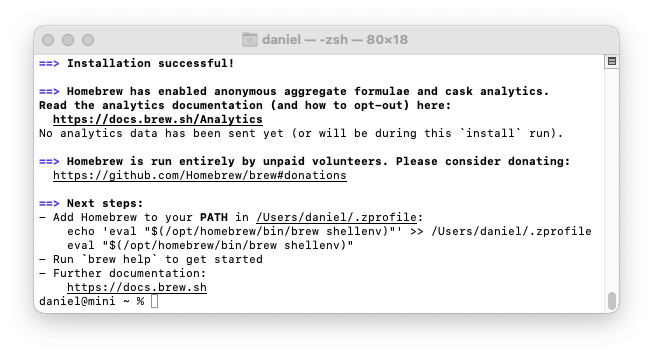
On Apple Silicon machines, there's one more step. Homebrew files are installed into the /opt/homebrew folder. But the folder is not part of the default $PATH. Follow Homebrew's advice and create a ~/.zprofile file which contains a command which sets up Homebrew. Homebrew shows instructions at the end of the installation process:
- Add Homebrew to your PATH in ~/.zprofile:
echo 'eval "$(/opt/homebrew/bin/brew shellenv)"' >> ~/.zprofile eval "$(/opt/homebrew/bin/brew shellenv)" The Homebrew console output will show your user directory name (the example above contains the Unix ~ tilde shortcut instead).
Alternative shell configuration
Alternatively, you can use a favorite text editor to edit the ~/.zprofile file. Or open ~/.zprofile to use TextEdit to edit the file. You'll need to add the line eval "$(/opt/homebrew/bin/brew shellenv)" to the file.
Some developers don't use the ~/.zprofile file, preferring to set the shell configuration in the ~/.zshrc file. That's okay, but the ~/.zshrc file is evaluated every time a shell is launched. The ~/.zprofile file is only evaluated when you login to your mac user account, so setting the shell with the ~/.zprofile file happens only once at login, saving some overhead.
After you've installed Homebrew, check that Homebrew is installed properly.
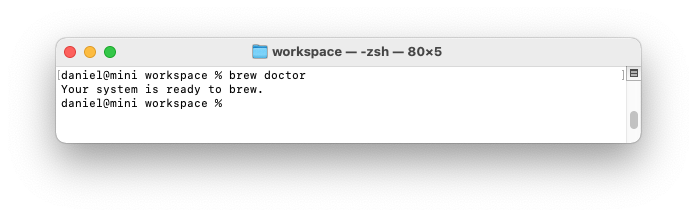
$ brew doctor You should see:
Your system is ready to brew. On Apple Silicon, if you see zsh: command not found: brew, check that you've created a ~/.zprofile file as described above and restart your terminal application.
If Homebrew is successfully installed, there will be Homebrew files in /usr/local (for macOS Intel) or /opt/homebrew (for Apple Silicon).
Listing installed packages
As you use Homebrew, it is helpful to see a list of all the packages you've installed:
[cpde]
$ brew list
You can also see a diagram of packages and dependencies.
$ brew deps --tree --installed
Right now, immediately after installation, these commands show nothing is installed.
Now you can use Homebrew to install packages. But first, be aware that you may have to reinstall Command Line Tools after a macOS upgrade.
After a macOS Upgrade
After a macOS upgrade (for example, from macOS 11.2.2 to 11.2.3), the upgrade process may remove the Command Line Tools. This can be annoying if you install an upgrade and then find you can't use commands such as git. You may encounter an error like:
xcrun: error: invalid active developer path (/Library/Developer/CommandLineTools),
missing xcrun at: /Library/Developer/CommandLineTools/usr/bin/xcrun
Checking for the Command Line Tools folder may show that the folder is there:
$ xcode-select -p
/Library/Developer/CommandLineTools
But look closely and the Command Line Tools folder may be missing essential folders and files after a macOS upgrade. It should look like this:
$ ls -l /Library/Developer/CommandLineTools
total 0
drwxr-xr-x  5 root  wheel  160 Jan  9 07:43 Library
drwxr-xr-x  5 root  wheel  160 Apr 24 16:19 SDKs
drwxr-xr-x  7 root  wheel  224 Apr 24 16:19 usr
It may look like this after an upgrade:
$ ls -l /Library/Developer/CommandLineTools
total 0
drwxr-xr-x  7 root  wheel  224 Apr 24 16:19 usr
Homebrew is installed but brew doctor will show problems:
% brew doctor

Warning: Git could not be found in your PATH.
Homebrew uses Git for several internal functions, and some formulae use Git
checkouts instead of stable tarballs. You may want to install Git:
  brew install git

Warning: No developer tools installed.
Install the Command Line Tools:
  xcode-select --install
You've already installed Homebrew and allowed Homebrew to install Xcode Command Line Tools. Now you must re-install Xcode Command Line Tools from the command line:
$ xcode-select --install
A message will pop up on the screen. Confirm that you want to install the tools.
You'll see a progress indicator as the software downloads.
Finally you'll see a confirmation that the software was installed.
Verify that you've successfully installed Xcode Command Line Tools.
$ xcode-select -p
/Library/Developer/CommandLineTools
Check that you can run git:
git --version
git version 2.30.1 (Apple Git-130)
You've seen how to reinstall Command Line Tools after a macOS upgrade.
huluculydi Inscrit: 1 y
Publié: 1 y
Red Light Therapy, also known as low-level laser therapy or photobiomodulation, involves the use of low-wavelength red light to stimulate cellular activity. Therapeutic benefits, can red light therapy regrow gums RLT is now gaining popularity for its surprising ability to contribute to skin tanning.
Jamesato Inscrit: 2 ans
Publié: 1 y
I just found this blog and have high hopes for it to continue. Keep up the great work, its hard to find good ones. I have added to my favorites. Thank You. Ageless Knee Review
Jamesato Inscrit: 2 ans
Publié: 1 y
Awesome blog. I enjoyed reading your articles. This is truly a great read for me. I have bookmarked it and I am looking forward to reading new articles. Keep up the good work! The Genius Wave Review
Jamesato Inscrit: 2 ans
Publié: 1 y
it was a wonderful chance to visit this kind of site and I am happy to know. thank you so much for giving us a chance to have this opportunity.. Sugar Defender Review
Jamesato Inscrit: 2 ans
Publié: 1 y
Such a very useful article. Very interesting to read this article.I would like to thank you for the efforts you had made for writing this awesome article. Joint Genesis Review
Jamesato Inscrit: 2 ans
Publié: 1 y
it was a wonderful chance to visit this kind of site and I am happy to know. thank you so much for giving us a chance to have this opportunity.. Sumatra Belly Tonic Review
Jamesato Inscrit: 2 ans
Publié: 1 y
It should be noted that whilst ordering papers for sale at paper writing service, you can get unkind attitude. In case you feel that the bureau is trying to cheat you, don't buy term paper from it. Peacock Free Trial
Jamesato Inscrit: 2 ans
Publié: 1 y
I really thank you for the valuable info on this great subject and look forward to more great posts Peacock Premium Free Trial
Jamesato Inscrit: 2 ans
Publié: 1 y
You actually make it look so easy with your performance but I find this matter to be actually something which I think I would never comprehend. It seems too complicated and extremely broad for me. I'm looking forward for your next post, I’ll try to get the hang of it! Alpilean Reviews
Jamesato Inscrit: 2 ans
Publié: 1 y
Going to graduate school was a positive decision for me. I enjoyed the coursework, the presentations, the fellow students, and the professors. And since my company reimbursed 100% of the tuition, the only cost that I had to pay on my own was for books and supplies. Otherwise, I received a free master’s degree. All that I had to invest was my time. City Emails for every location in Germany